This tutorial will give you an overview of how to build and utilize triggers. First, let’s talk about what triggers are: Triggers are essentially “if, then” statements that automate features of your system. There are numerous ways to customize these features so that IF something happens in your system, THEN a particular action (or actions) will follow. By setting up these automations, you’re able to operate your business more efficiently.
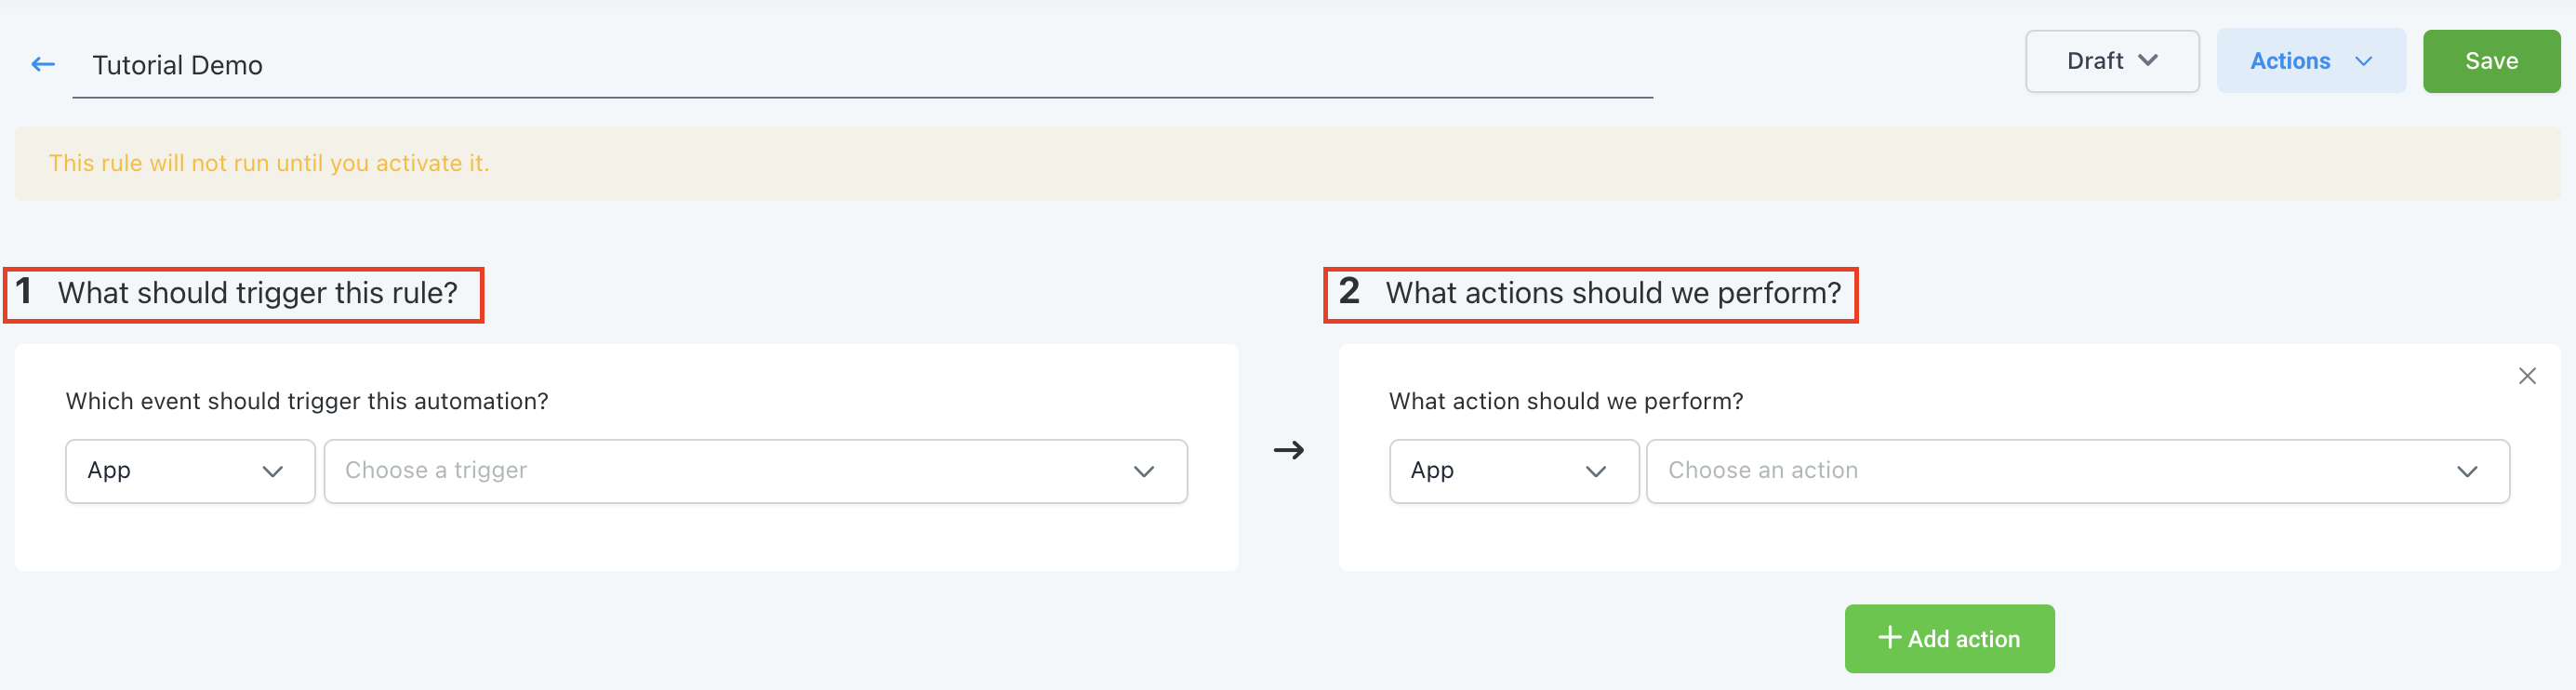
There are 2 parts to creating a trigger, the “IF” is Part 1: What should trigger this rule.
The “THEN” is Part 2: What actions should be perform?
You can completely customize these features with one or multiple actions. Some common examples of triggers are shown below:
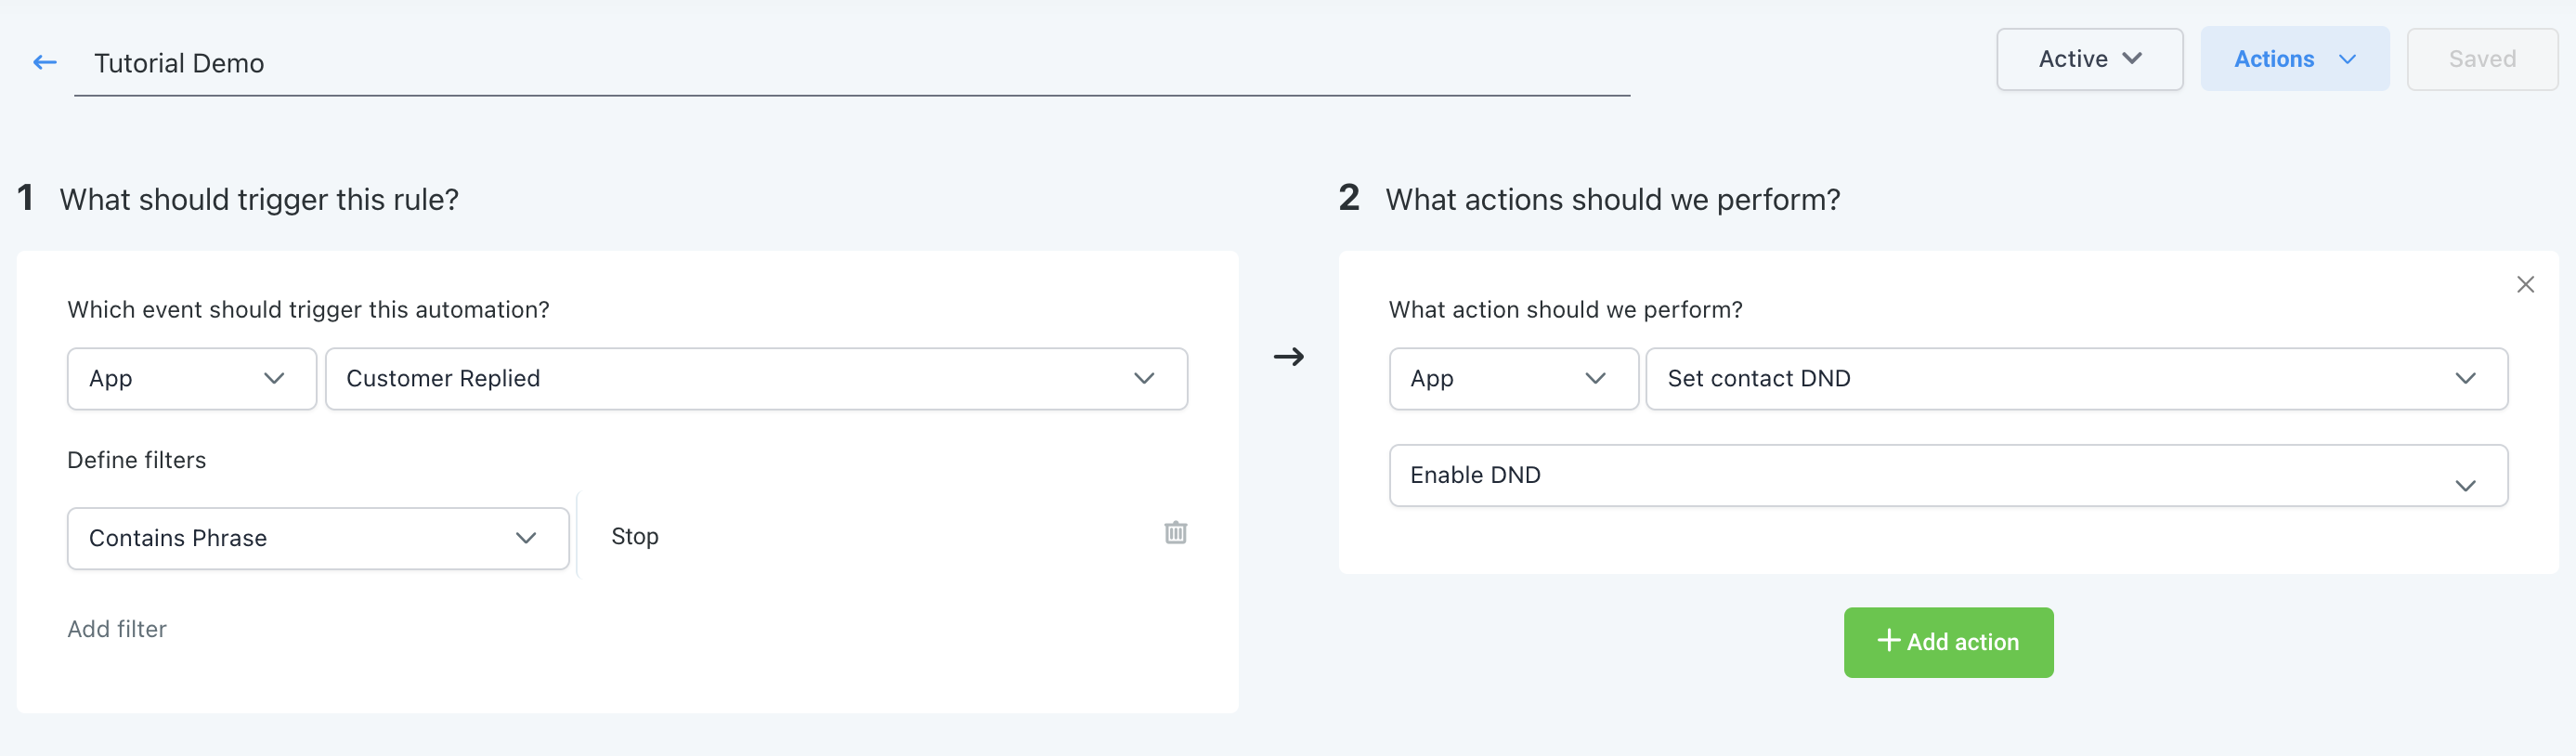
IF the customer reply is “stop” > THEN the DND is enabled.
IF the Two step order form completed THEN add the contact to a campaign and tag the contact.

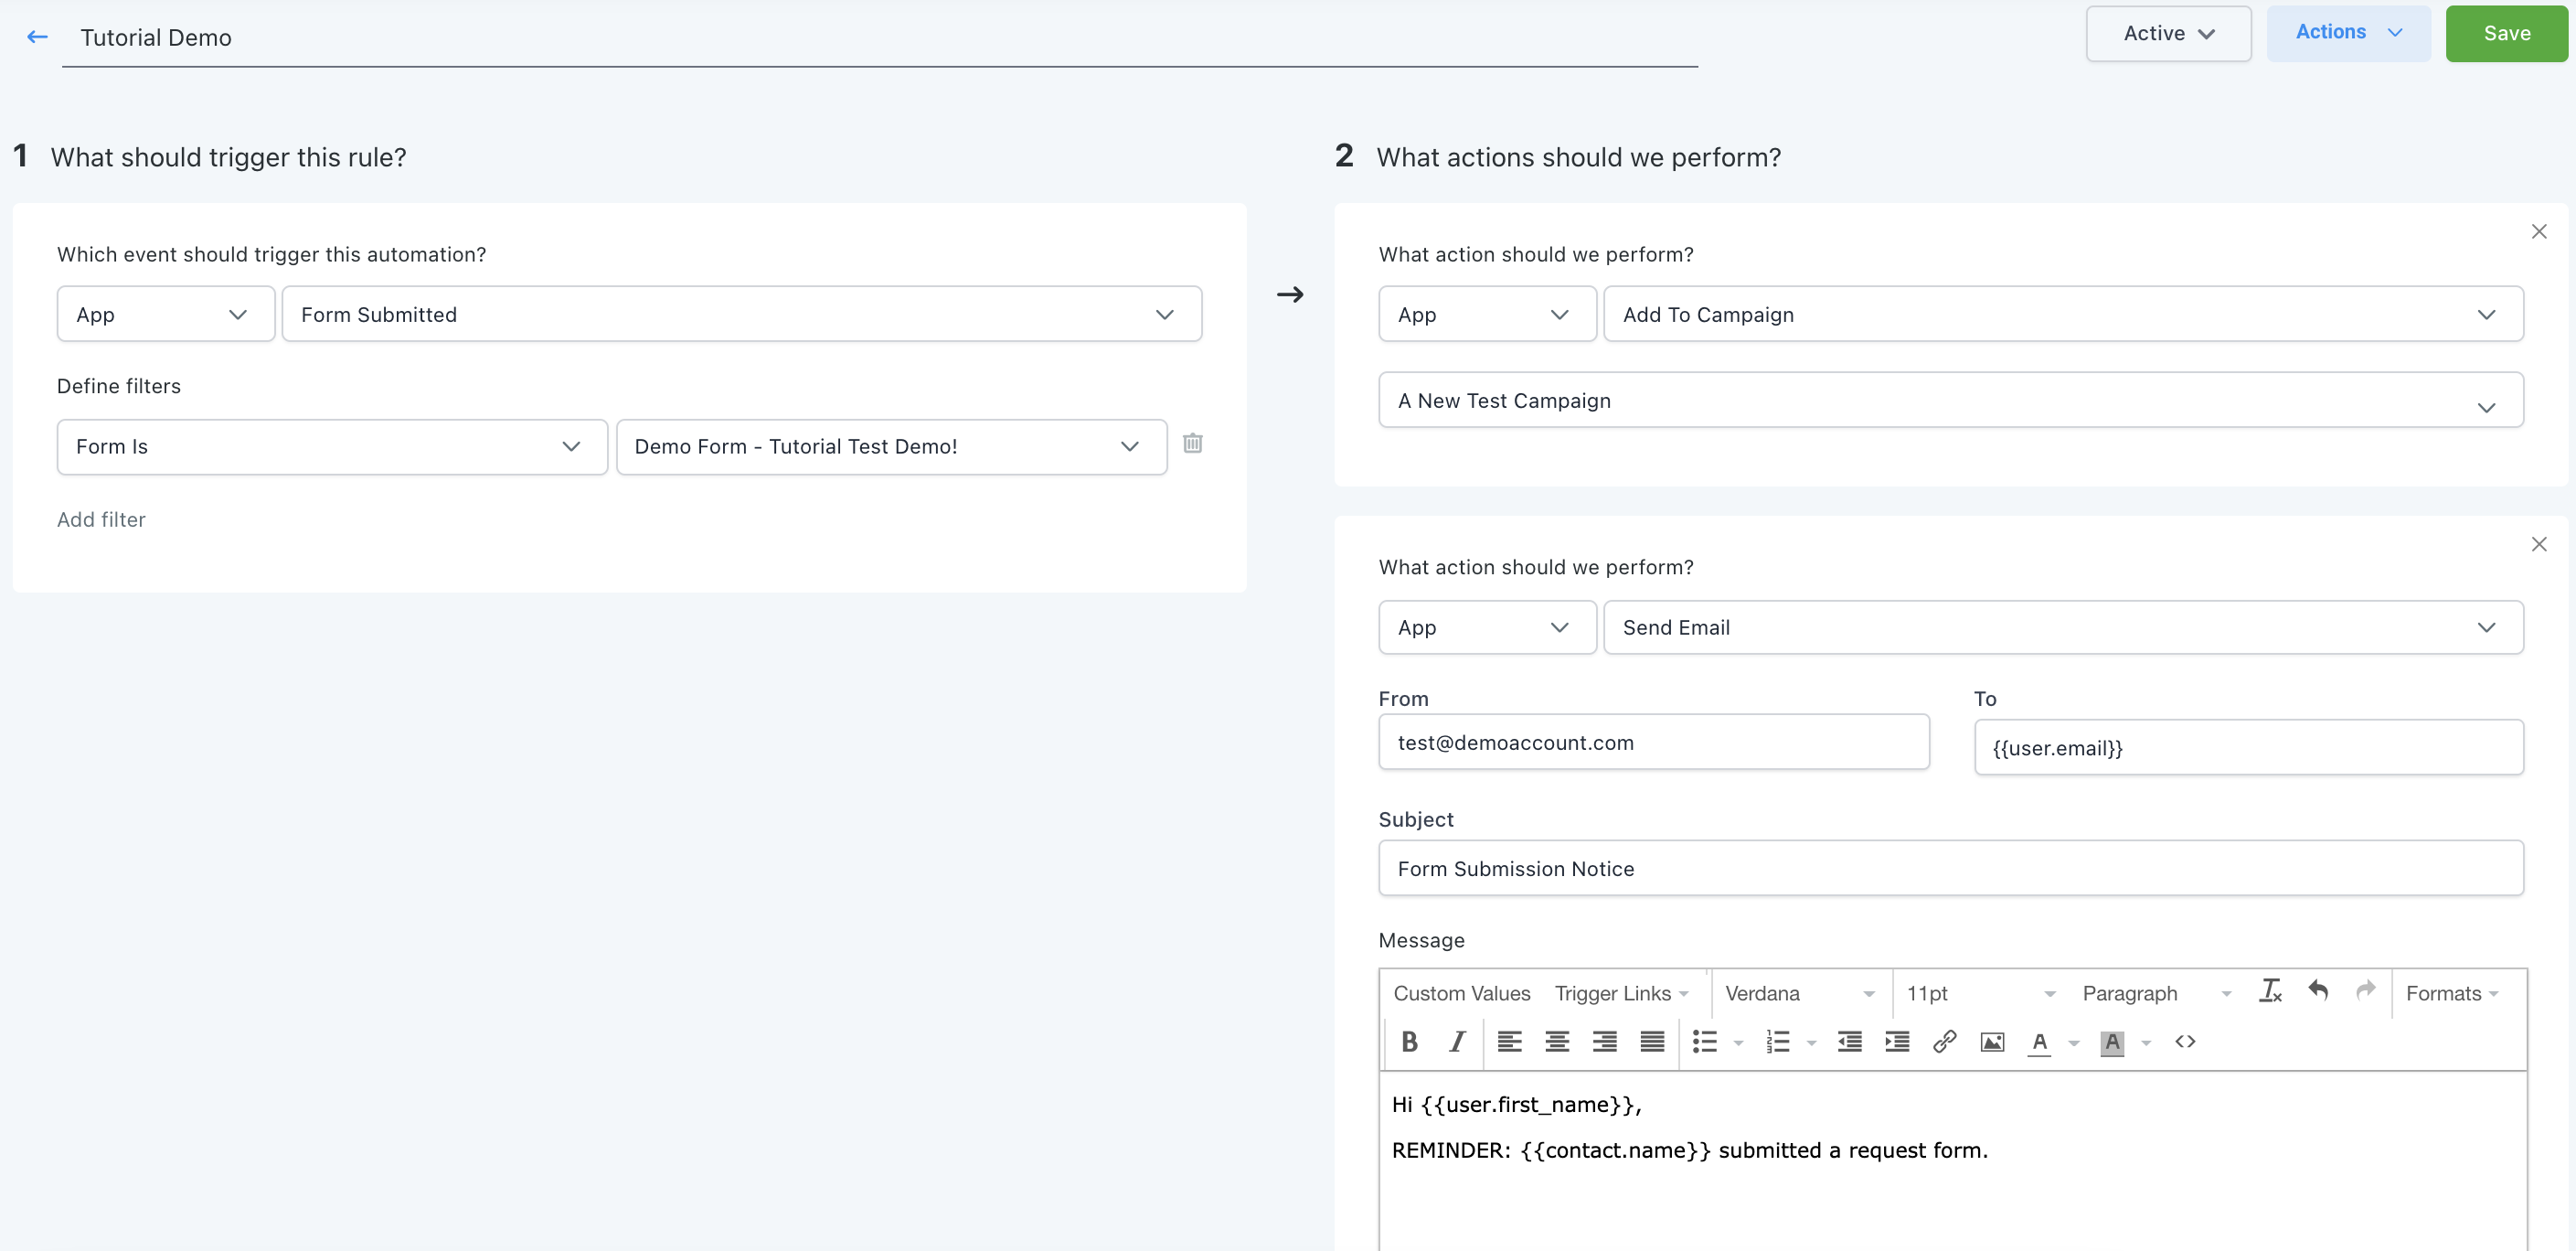
IF a form is submitted THEN add the contact to a campaign, and send an email notification to the User.
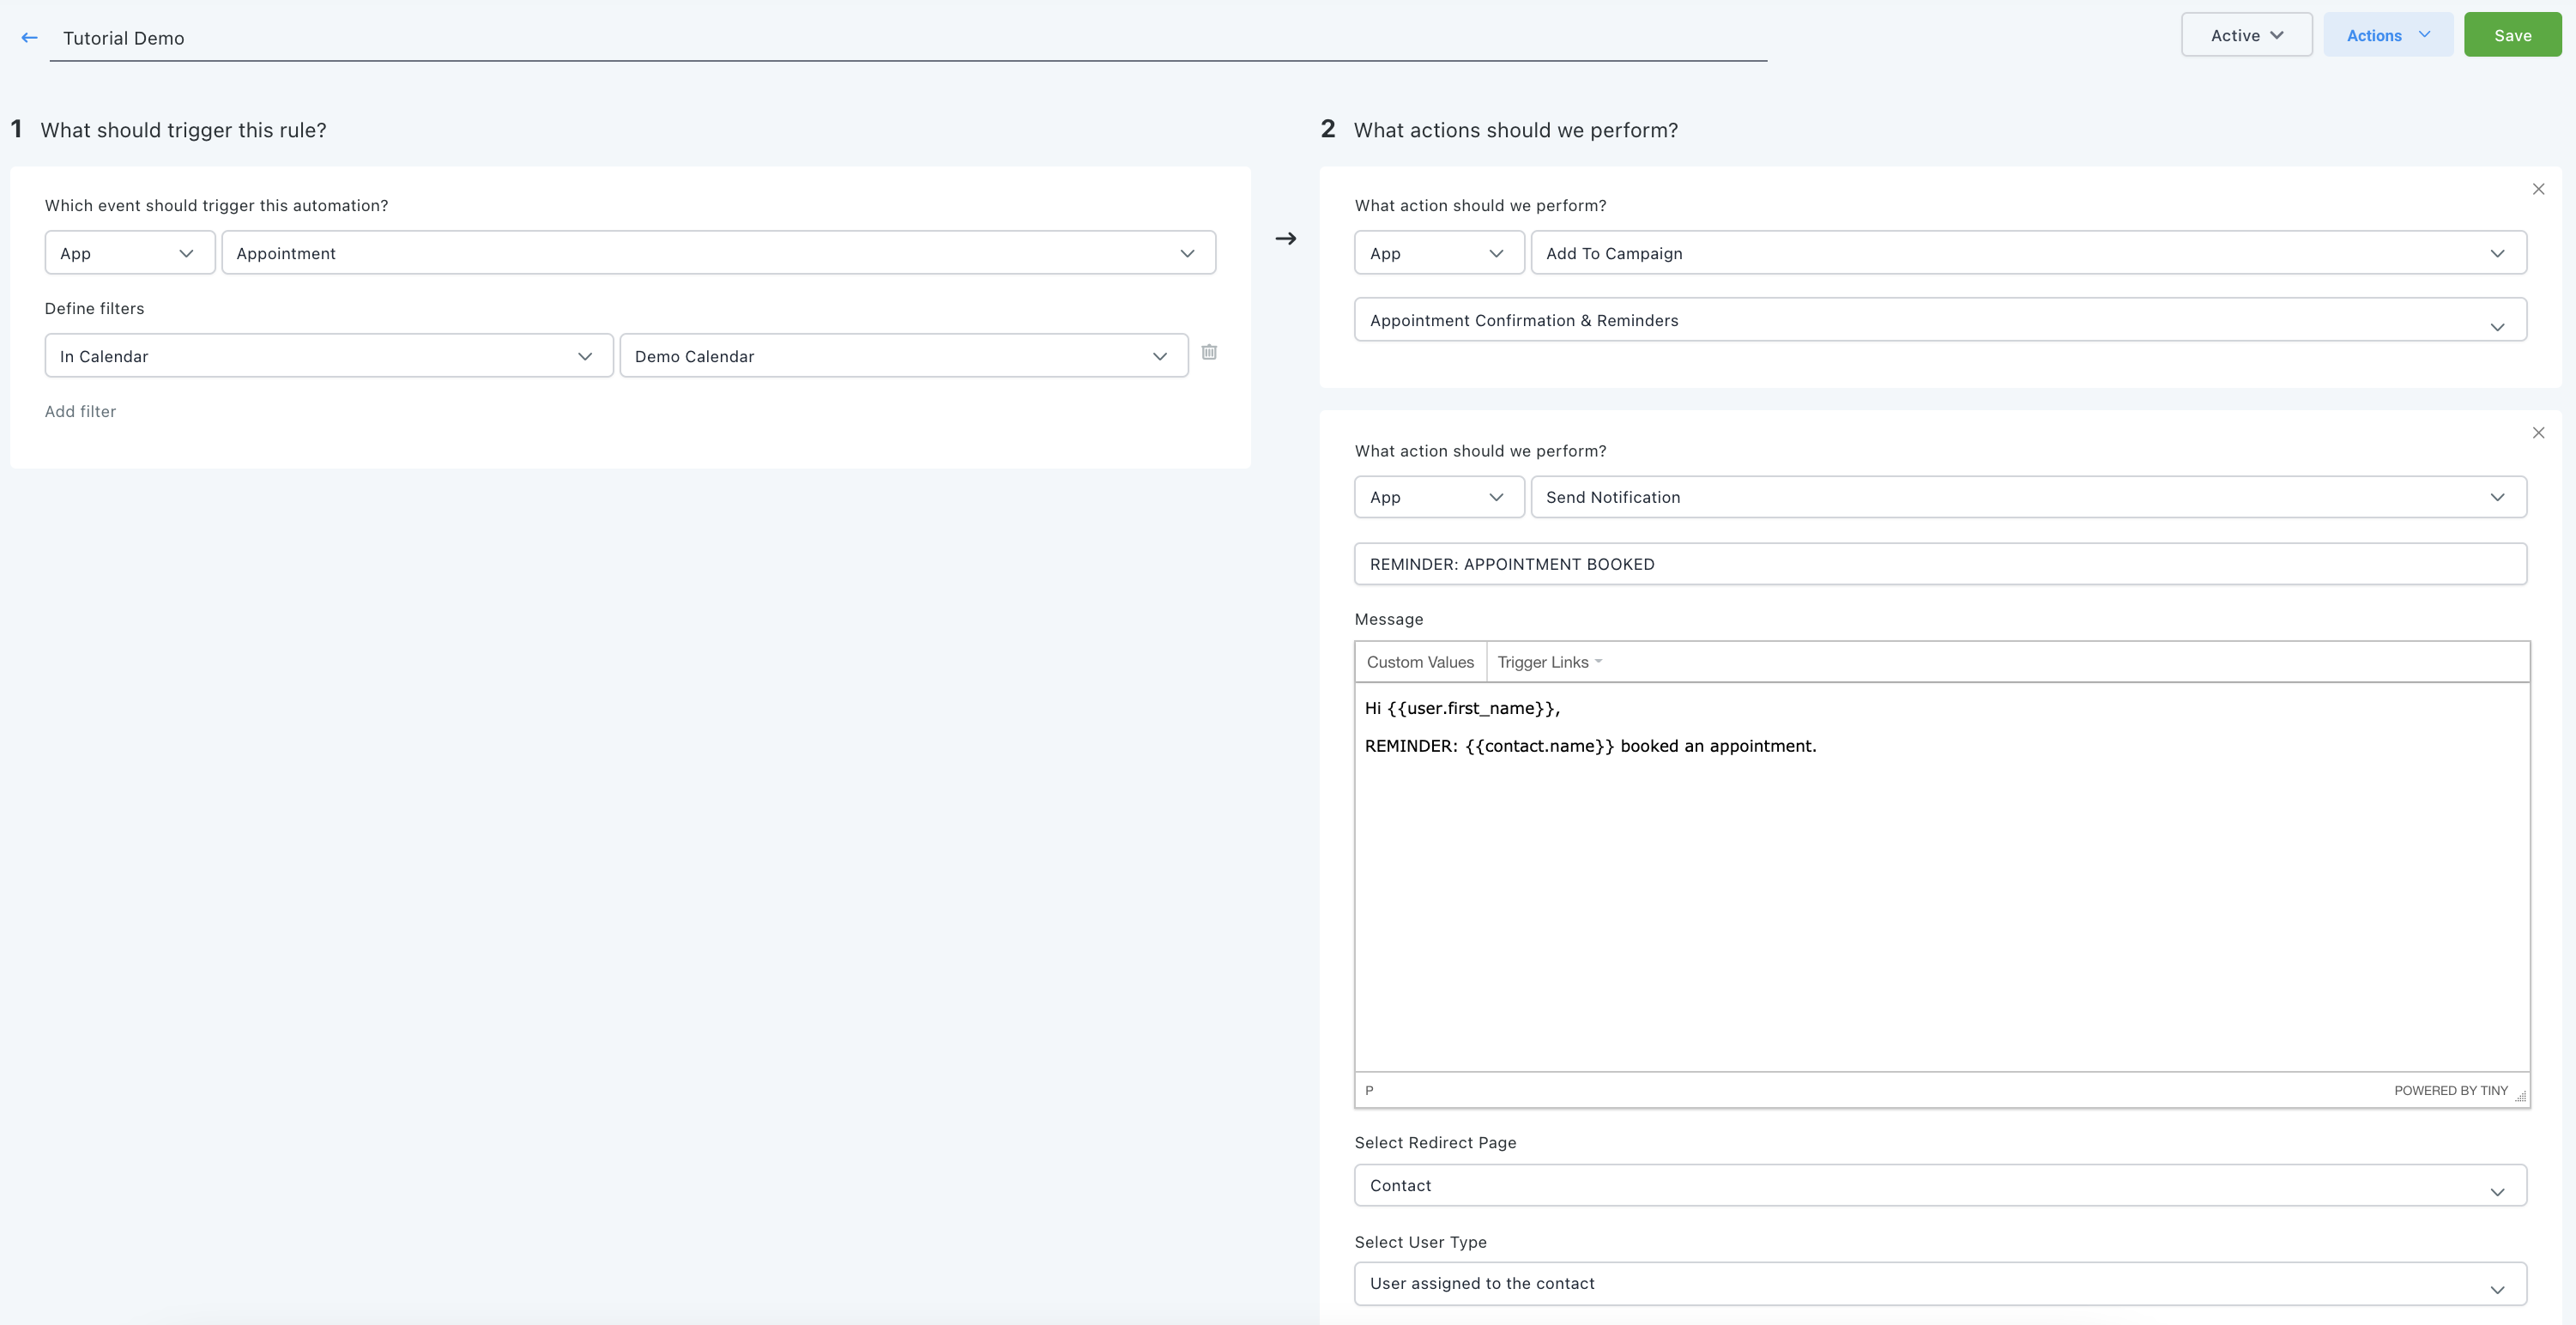
IF a customer booked an appointment THEN add them to the Appt. Reminder campaign, and send a notification to the User.
Once you’ve created a trigger, click Save in the top right. By default, it will be set to “Draft” mode, so you’ll need to switch that dropdown to “Activate” in order for the trigger to function.