The Event Start Date field allows you to build automation around a specific date & time. Once you set the Event Start Date, the items in that workflow can be sent in relation to that day and time using the 'before' and ‘after’ actions. This is useful for sending out reminders for both in-person and online events with a set time for the entire group of leads (e.g webinars, conferences, etc.) Or, maybe you want to schedule something in the system to occur after the event, such as sending out a follow-up email. Follow these steps to learn how to customize your Workflows using the Event Start Date.
Step 1: Set the Event Start Date in the Workflow’s Settings
- Navigate into the particular Workflow you want to edit.
- Click into the Settings tab.
- Enter an “Event Start date”.

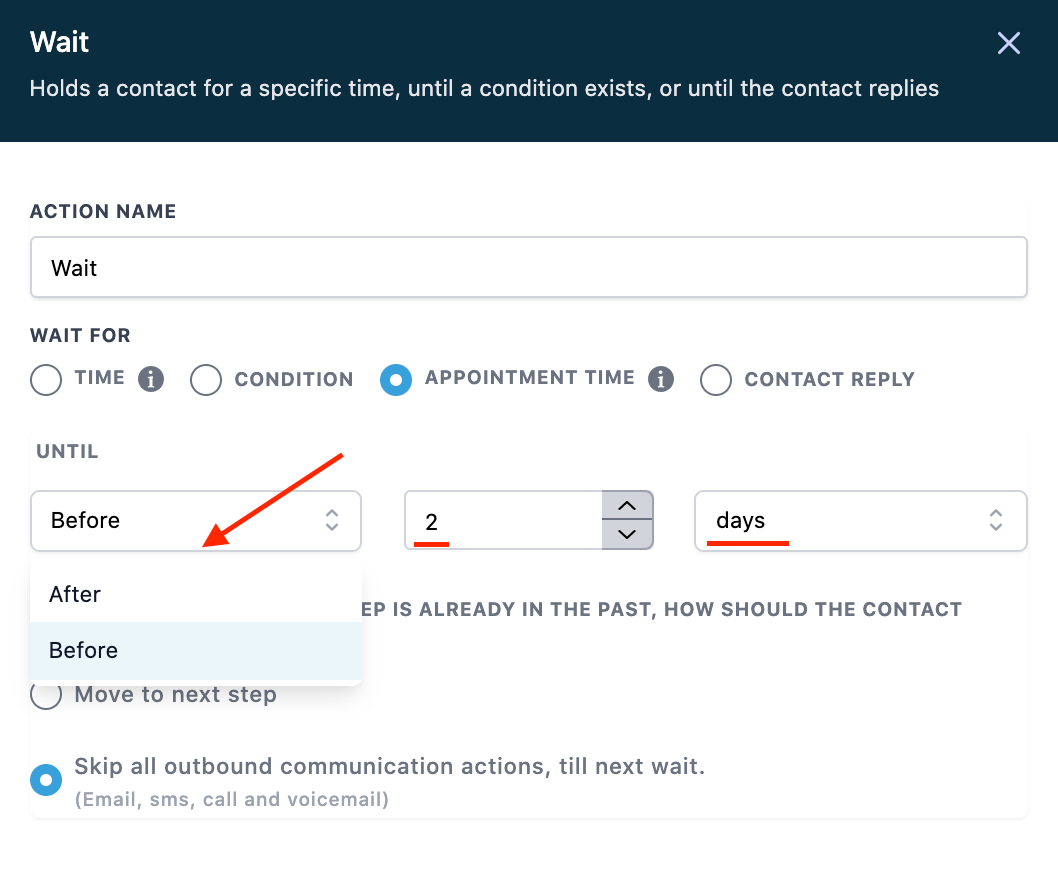
Step 2: Set up the Wait / Appointments action.
- Add a “Wait” action within the Workflow.
- Use “Appointment Time” and set up the “Until” section with before or after X number of days/hours/minutes.

- If you set this to 2, as shown below, it will wait and send off the action 2 days before the scheduled Event Start Date.
- Save to confirm any changes you’ve made.
NOTE: This action is repeatable within the workflow.